How To Change Calendar Permissions In Outlook
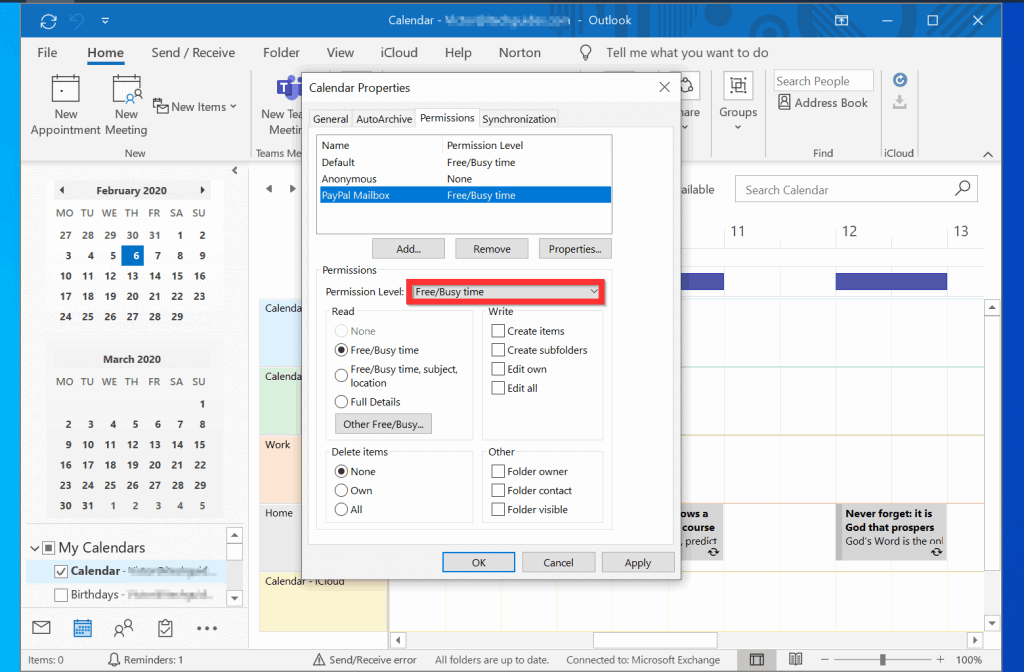
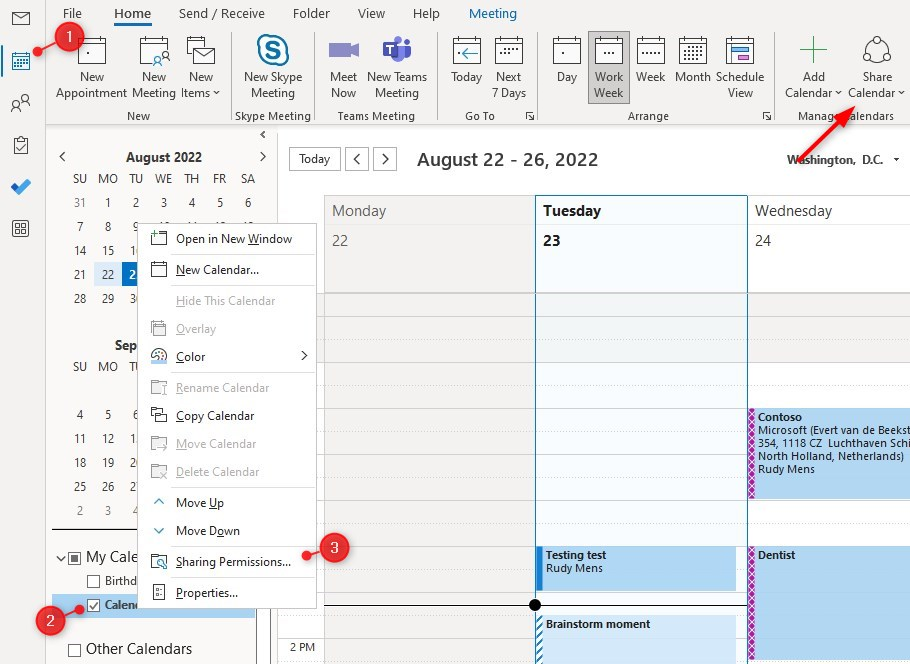
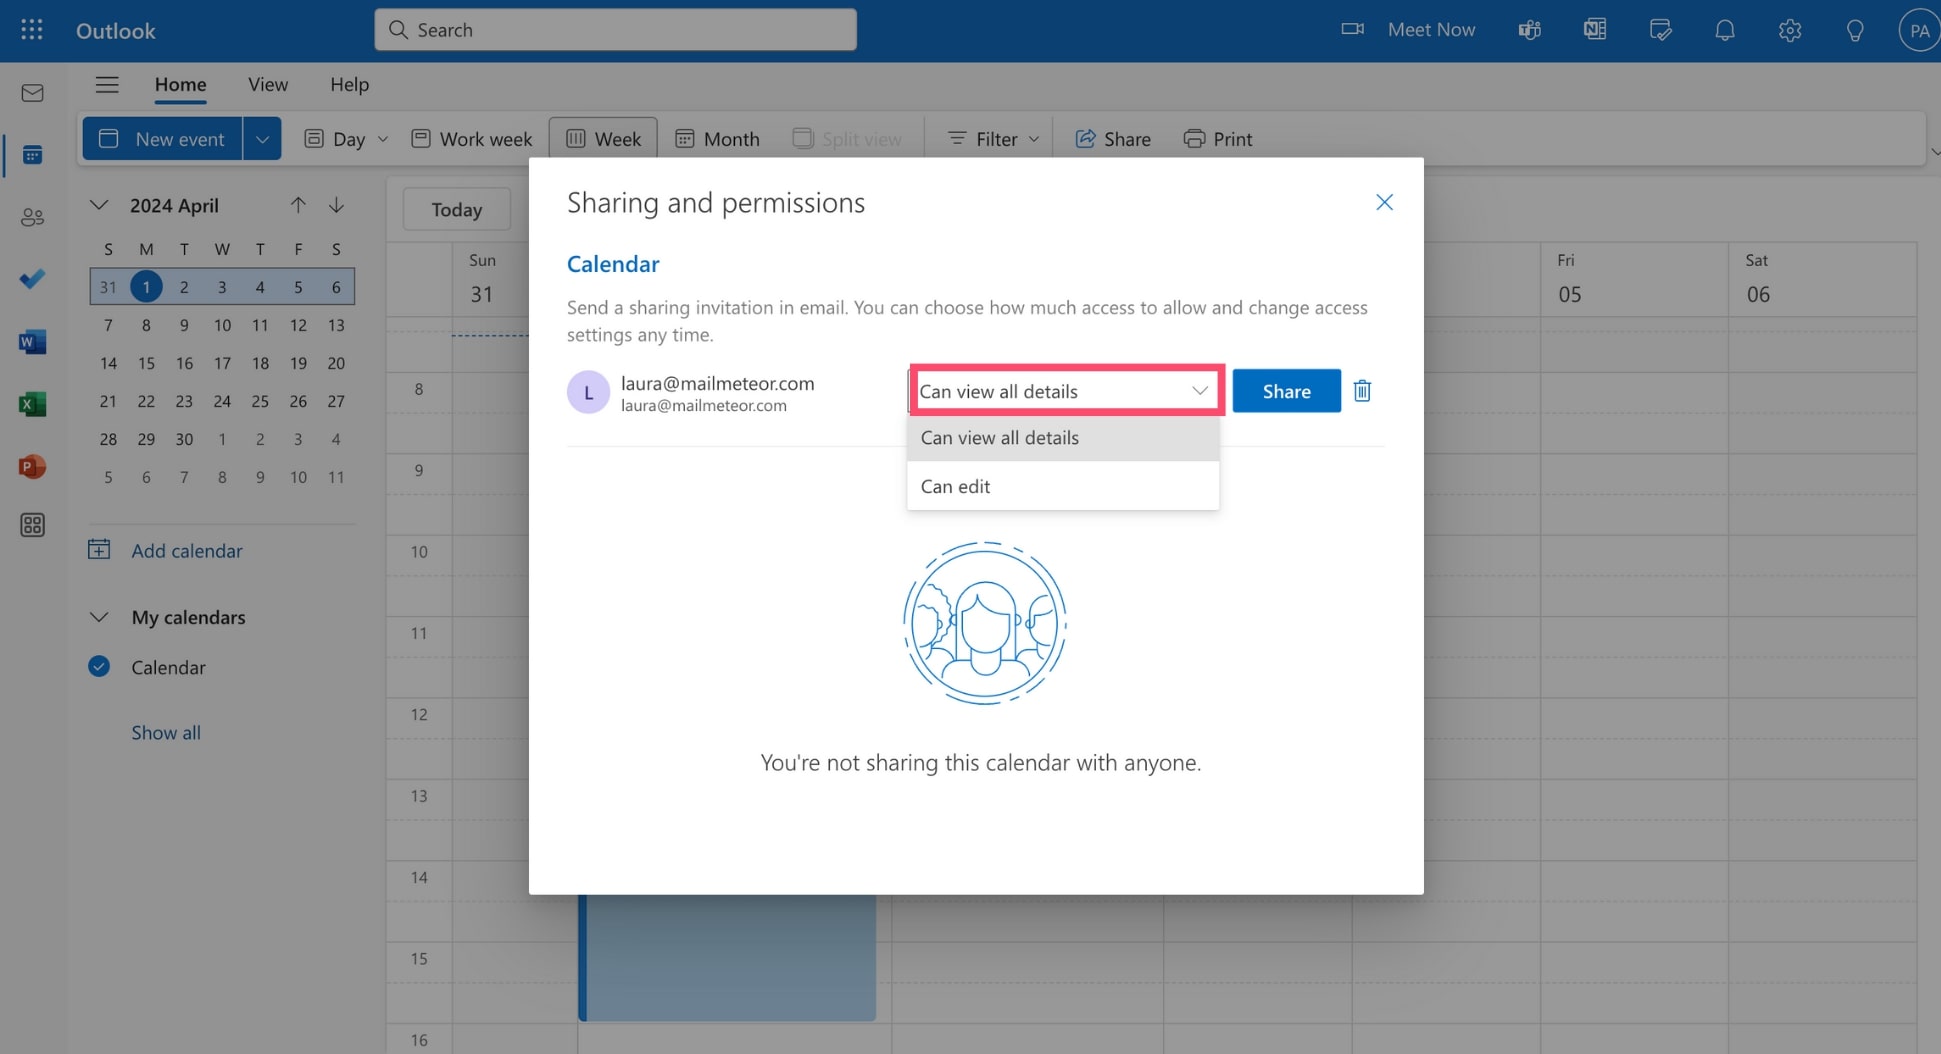
How To Change Calendar Permissions In Outlook - After you share the calendar with other people, you can change the view permission with the steps below, if you think the person should have a higher or lower level: Enter the user’s email address and click add. Can add, modify, and delete calendar. Steps to change default calendar permissions in outlook; To change how your calendar is shared, select your office 365 user from the list below and follow the instructions for that particular user. Open outlook > go to calendar > select that calendar folder/shared calendar (created by that left employee) , now right click on it and go to sharing permission > under. Follow the instructions and screenshots to remove or alter permissions for individual accounts or groups. To give calendar access, you need to set permissions for each user. Allow another person or delegate to. Setting permissions for someone on your calendar. To change this, you can adjust your calendar sharing permissions. Allow messages to be sent on your behalf when sharing a folder or mailbox. Click on the add button to add a new user. Enter the user’s email address and click add. Print hard copies of your new teams calendar to distribute to people in person or keep on hand for easy access offline. You can do the related operations in outlook client by following the steps below: To change how your calendar is shared, select your office 365 user from the list below and follow the instructions for that particular user. Open outlook > go to calendar > select that calendar folder/shared calendar (created by that left employee) , now right click on it and go to sharing permission > under. Can add, modify, and delete calendar. Changing calendar permissions in outlook is a straightforward process that can be completed in a few steps. To change permissions in your outlook calendar, you need to understand the different types of permissions that are available: In this article, we will explore how to change permissions in outlook calendar, ensuring that you have the necessary access to manage your calendar effectively. By following these steps and using the table to guide you, you can. Print hard copies. In this article, we will explore how to change permissions in outlook calendar, ensuring that you have the necessary access to manage your calendar effectively. Steps to change default calendar permissions in outlook; Click on the share button in the top ribbon. Print hard copies of your new teams calendar to distribute to people in person or keep on hand. By following these steps and tips, you can effectively change calendar permissions in outlook, ensuring data security, accountability, and organizational efficiency. To change permissions in your outlook calendar, you need to understand the different types of permissions that are available: Click on the add button to add a new user. Allow another person or delegate to. Can add, modify, and. By following these steps and using the table to guide you, you can. Setting permissions for someone on your calendar. By following these steps and tips, you can effectively change calendar permissions in outlook, ensuring data security, accountability, and organizational efficiency. Open outlook and go to your calendar. Follow the instructions and screenshots to remove or alter permissions for individual. Learn how to set or modify permissions on your calendar in outlook 2016 for windows. Share and access a calendar with edit or delegate permissions in outlook. Allow another person or delegate to. Allow messages to be sent on your behalf when sharing a folder or mailbox. Follow the instructions and screenshots to remove or alter permissions for individual accounts. Steps to change default calendar permissions in outlook; To give calendar access, you need to set permissions for each user. Open outlook and go to your calendar. To change how your calendar is shared, select your office 365 user from the list below and follow the instructions for that particular user. Choose which view, layout, and time range you want. View current calendar permissions in microsoft. To change this, you can adjust your calendar sharing permissions. To change how your calendar is shared, select your office 365 user from the list below and follow the instructions for that particular user. Enter the user’s email address and click add. Changing calendar permissions in outlook is a straightforward process that can be. To change permissions in your outlook calendar, you need to understand the different types of permissions that are available: Important powershell cmdlets to manage calendar permissions; View current calendar permissions in microsoft. Click on the add button to add a new user. Print hard copies of your new teams calendar to distribute to people in person or keep on hand. Click on the add button to add a new user. Setting permissions for someone on your calendar. Click on the share button in the top ribbon. To change permissions in your outlook calendar, you need to understand the different types of permissions that are available: There are four basic permission levels that can be. You can do the related operations in outlook client by following the steps below: Setting permissions for someone on your calendar. Follow the instructions and screenshots to remove or alter permissions for individual accounts or groups. Print hard copies of your new teams calendar to distribute to people in person or keep on hand for easy access offline. To change. By following these steps and using the table to guide you, you can. Print hard copies of your new teams calendar to distribute to people in person or keep on hand for easy access offline. Choose which view, layout, and time range you want to print and. Follow the instructions and screenshots to remove or alter permissions for individual accounts or groups. There are four basic permission levels that can be. Setting permissions for someone on your calendar. Enter the user’s email address and click add. After you share the calendar with other people, you can change the view permission with the steps below, if you think the person should have a higher or lower level: Click on the add button to add a new user. By following these steps and tips, you can effectively change calendar permissions in outlook, ensuring data security, accountability, and organizational efficiency. Allow messages to be sent on your behalf when sharing a folder or mailbox. To change permissions in your outlook calendar, you need to understand the different types of permissions that are available: To change this, you can adjust your calendar sharing permissions. To change permissions for someone see the instructions below. Open outlook and go to your calendar. You can do the related operations in outlook client by following the steps below: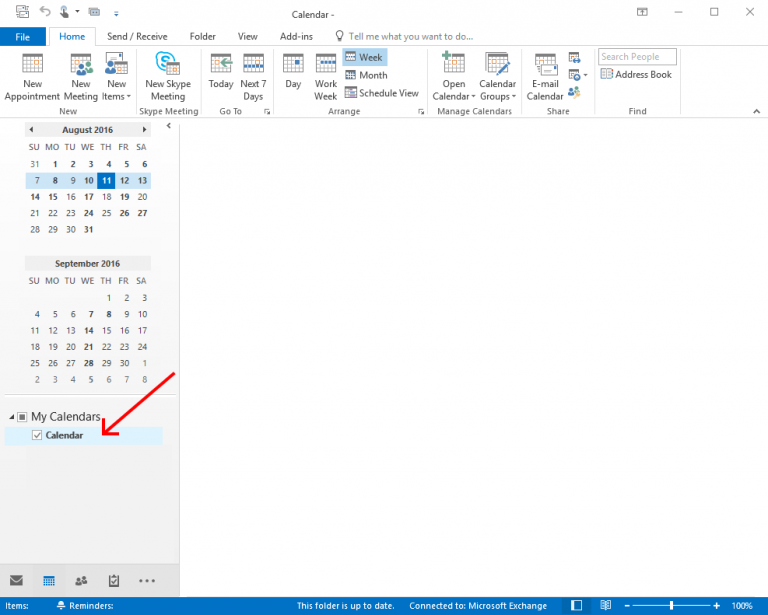
Share Calendar or Change Calendar Permissions in Outlook Office of

How to Configure Office 365 Calendar Permissions Easy365Manager

How To Change Calendar Permissions In Outlook

How To Change Calendar Permissions In Outlook Printable Computer Tools
Outlook Calendar Permissions Explained Blair Adriena

How To Change Permissions On Outlook Calendar Becca Charmane

Permission Levels Outlook Calendar Joaquin Theo
How To Change Calendar Permissions In Outlook 365 Charyl Merrielle
How To Change Group Calendar Permissions In Outlook Design Talk
How to Share Your Outlook Calendar (On Web, Desktop, or Mobile)
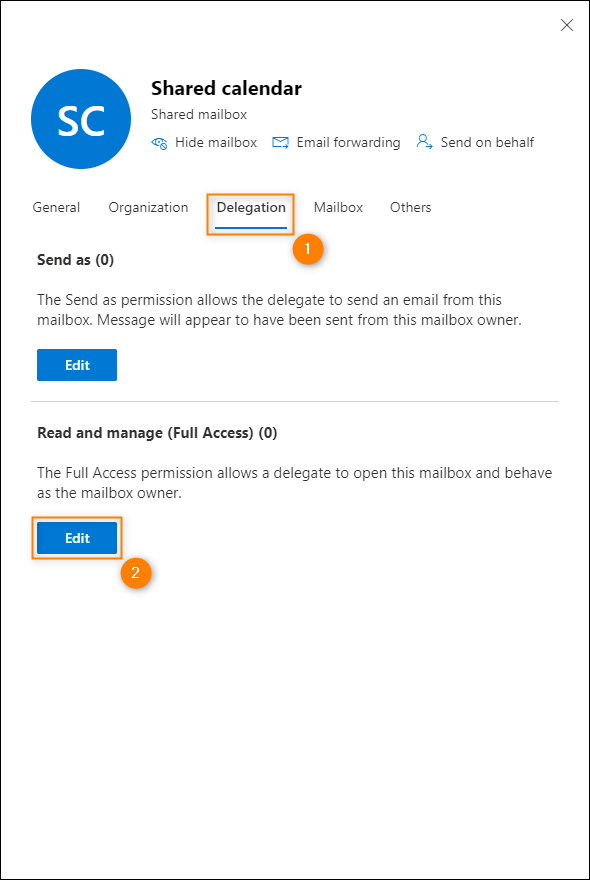
Allow Another Person Or Delegate To.
To Change How Your Calendar Is Shared, Select Your Office 365 User From The List Below And Follow The Instructions For That Particular User.
Share And Access A Calendar With Edit Or Delegate Permissions In Outlook.
Steps To Change Default Calendar Permissions In Outlook;
Related Post: